Trending

Tuesday, September 9, 2014

Her Fashion Box: August


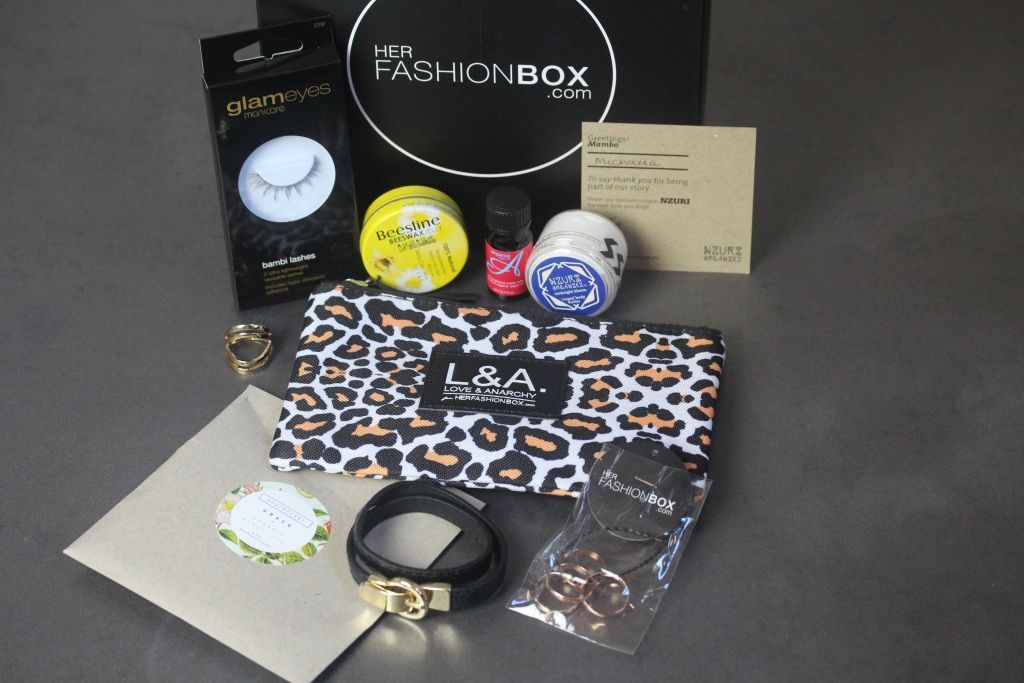
August's HFB saw another designer collaboration with fashion label Love&Anarchy. 


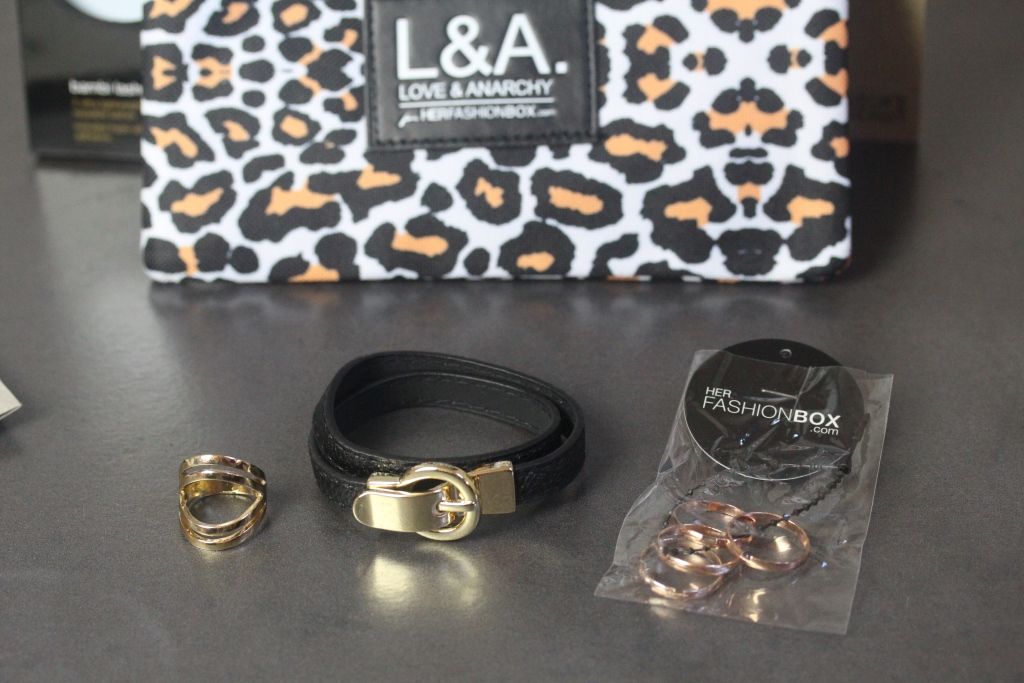
The main fashion item in this month's box was the L&A pouch (RRP $29.99). This one is smaller than the one we got with Nicola Finetti, but it appears to be made out of the same material. Leopard print is always fun. 

In the classic box we got a four-set of rose gold rings (RRP $15.99), which are a cute idea but are all way too big for me. The magazine goes on and on about midi rings, but these are too big as normal rings, let alone midi rings. Not sure if I got a wrong set or if that's what everyone got. 


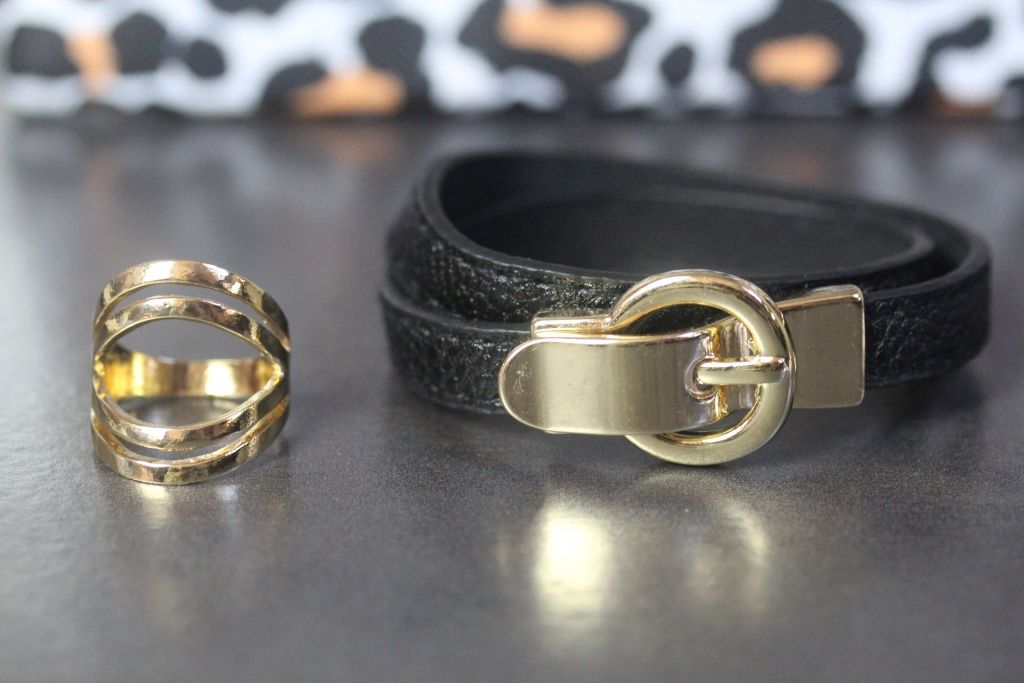
This month's box also contained another wrap bracelet. I think these are pretty cute, so I'm okay with receiving them. This one's RRP is $26.99


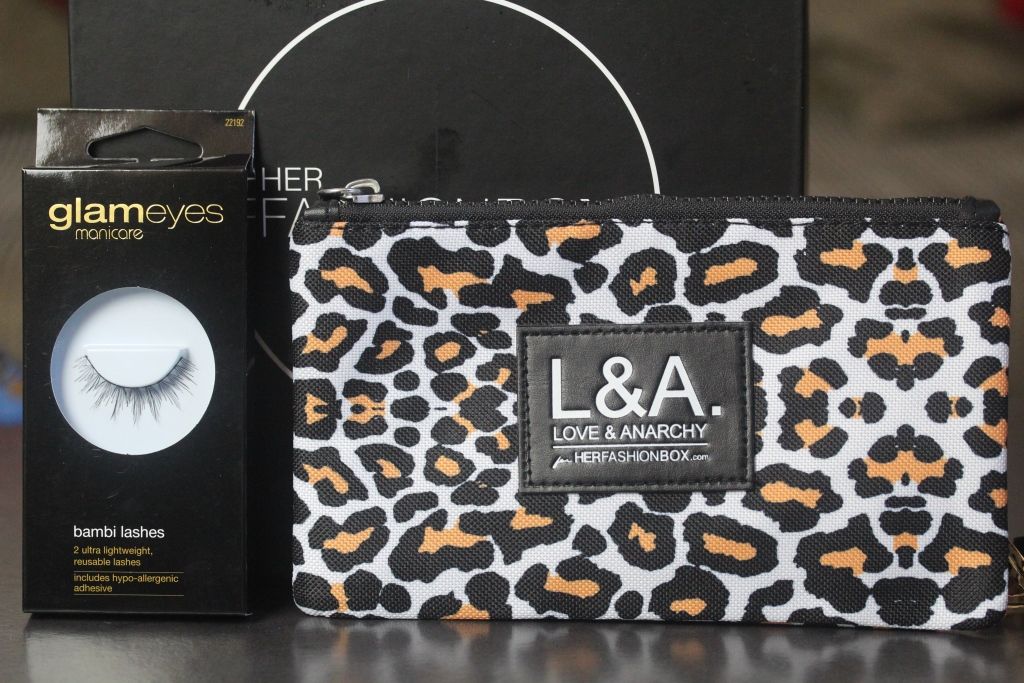
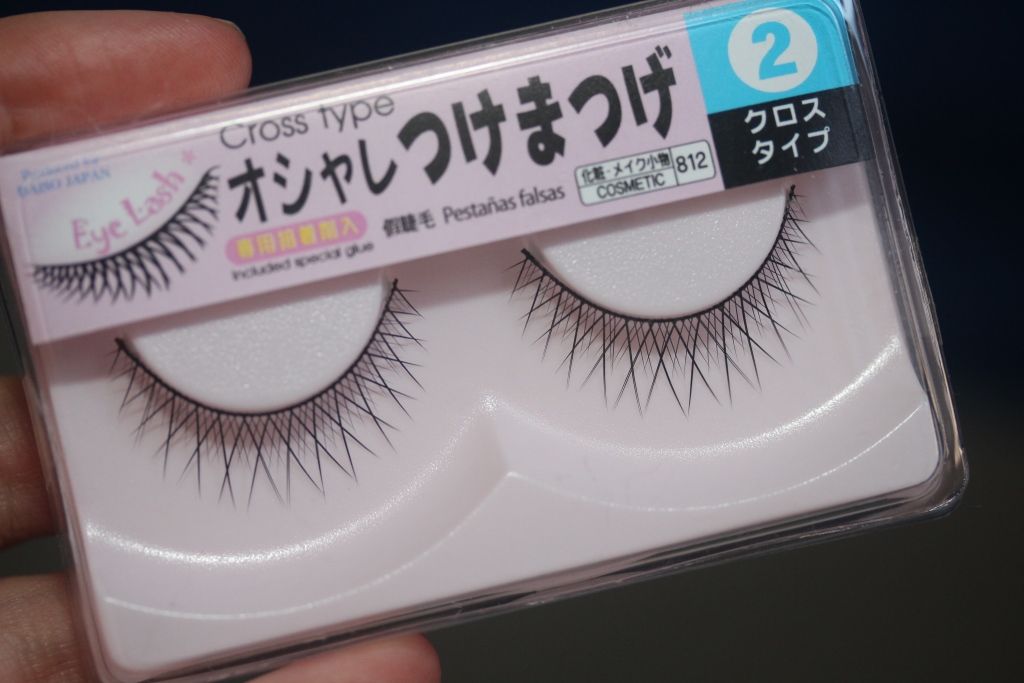
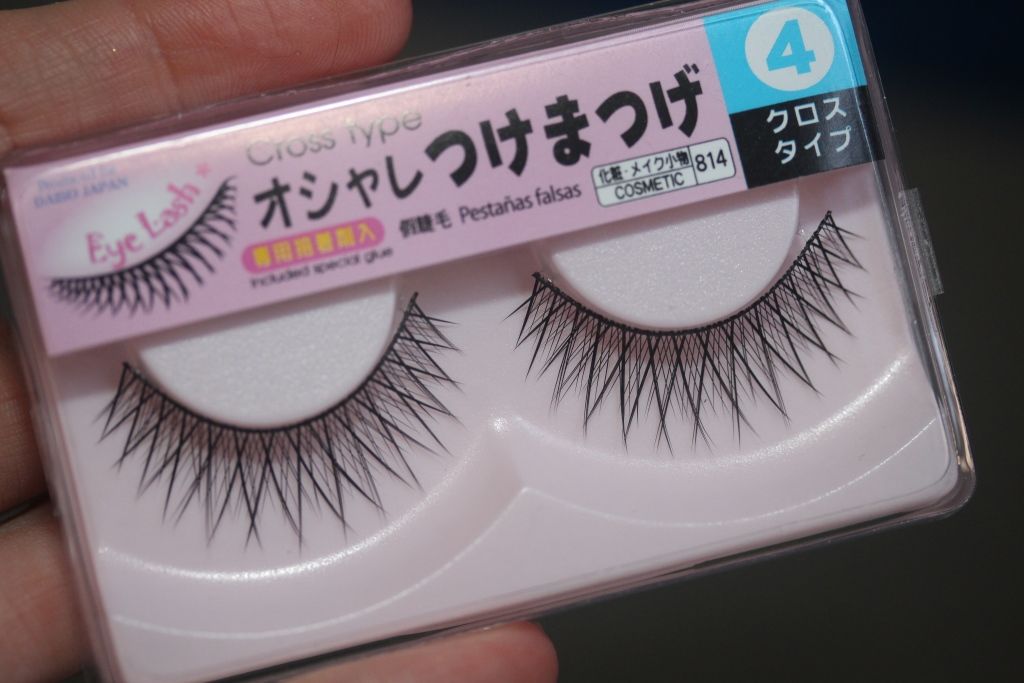
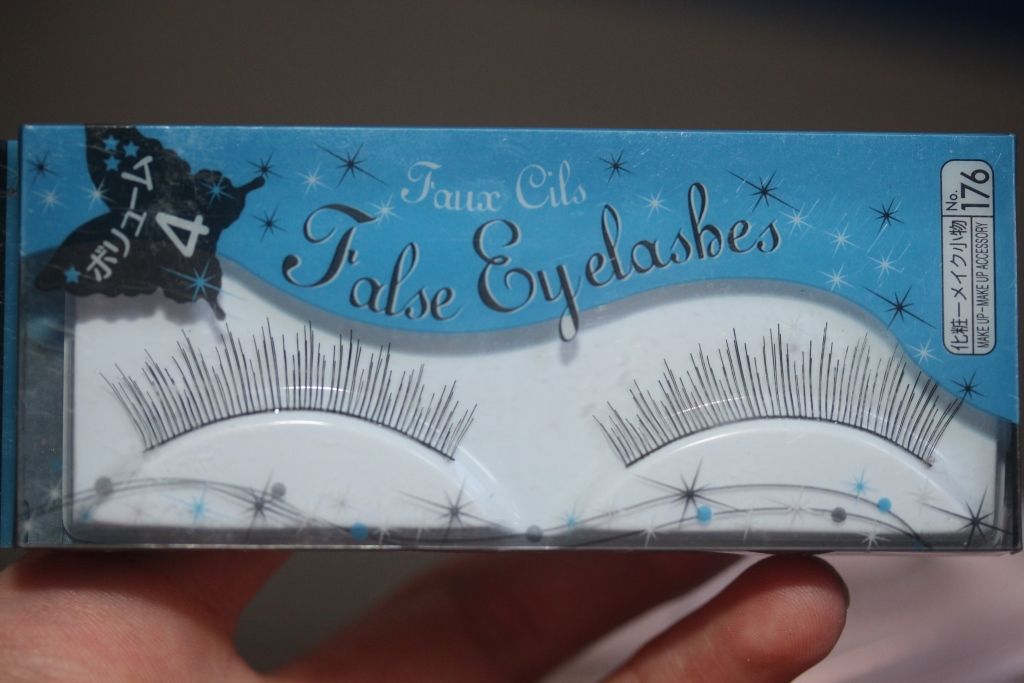
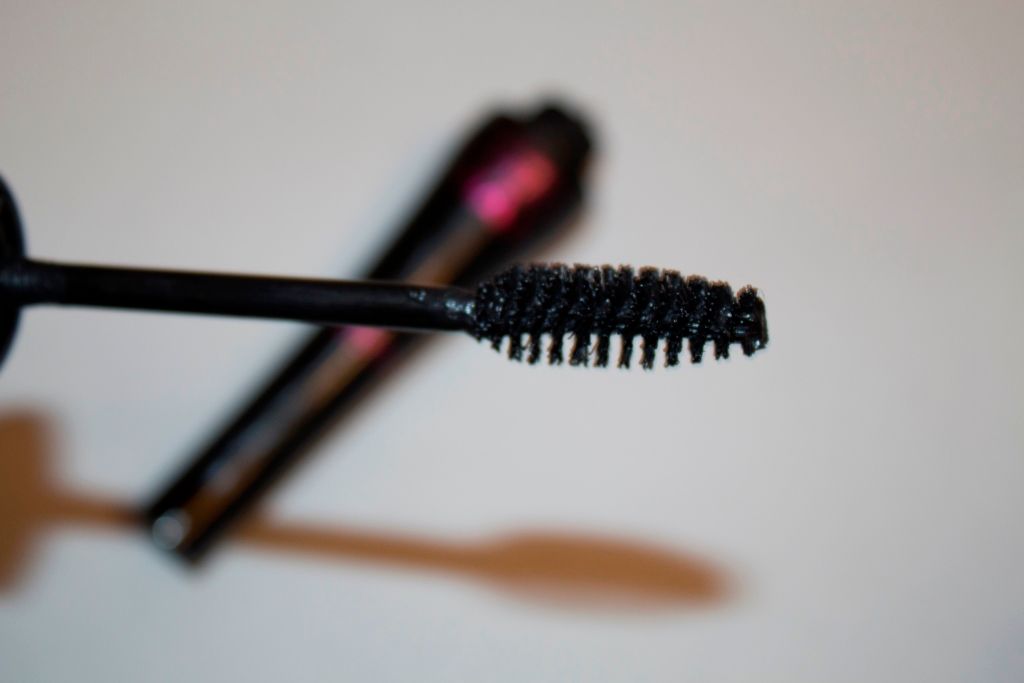
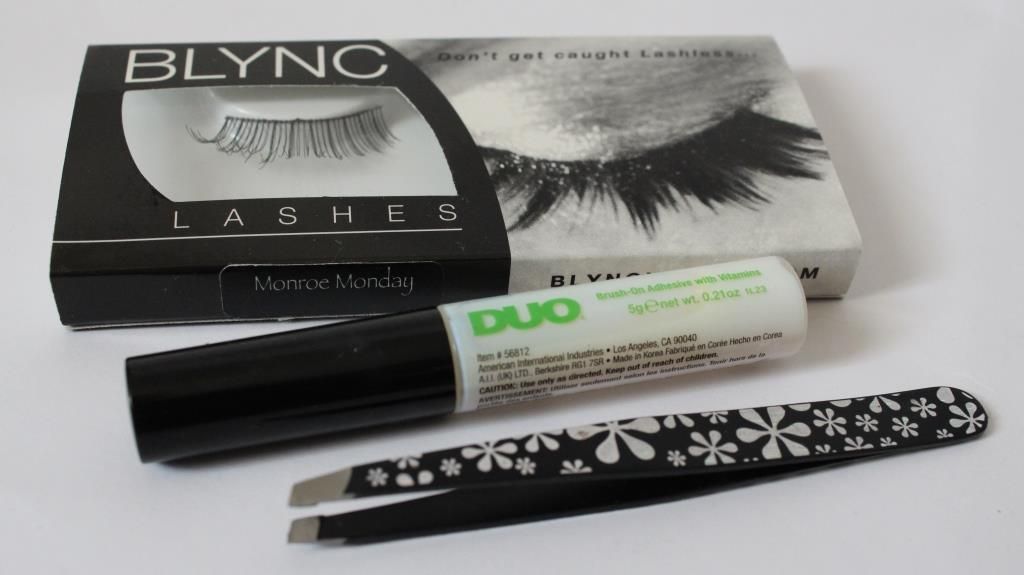
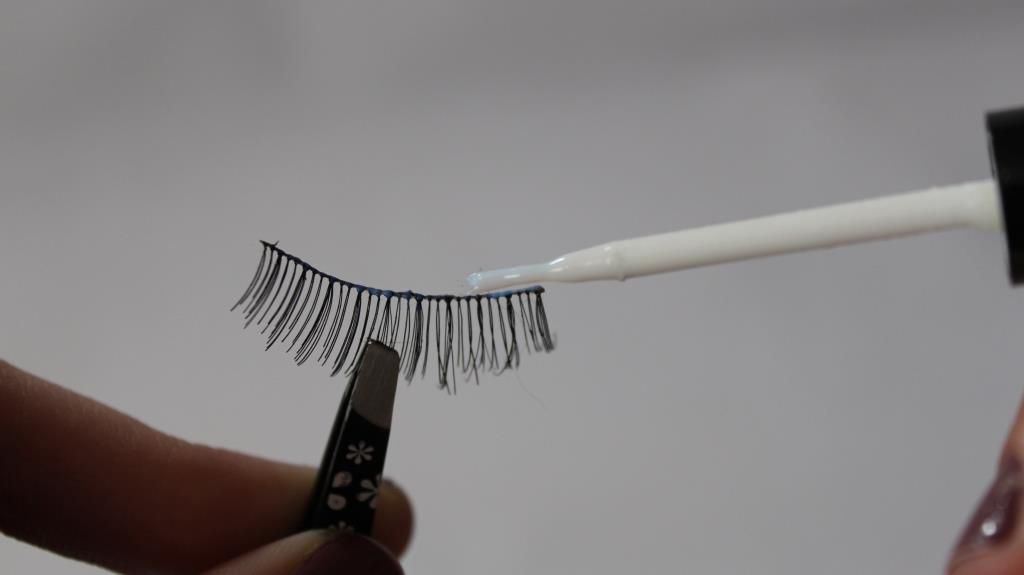
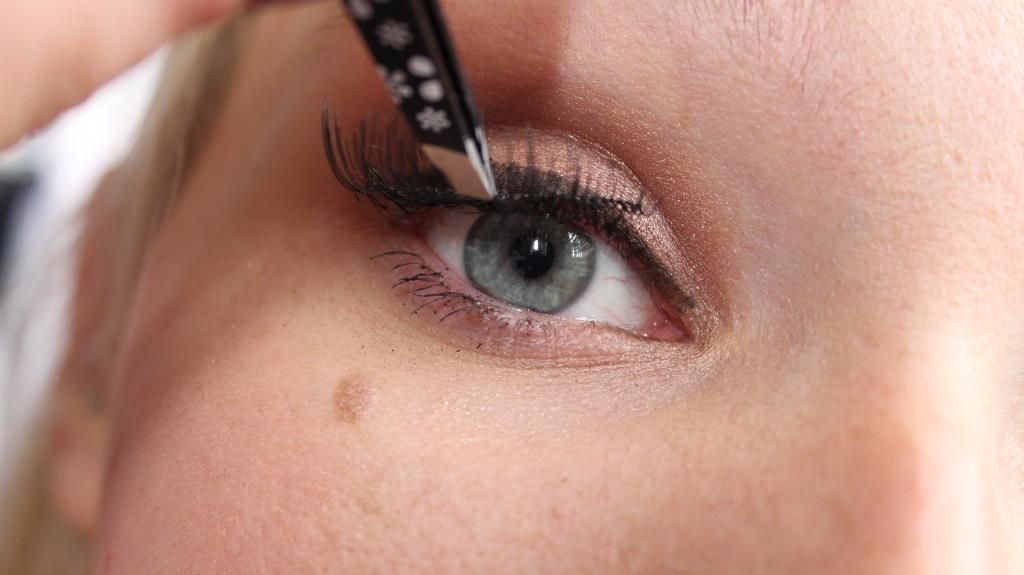
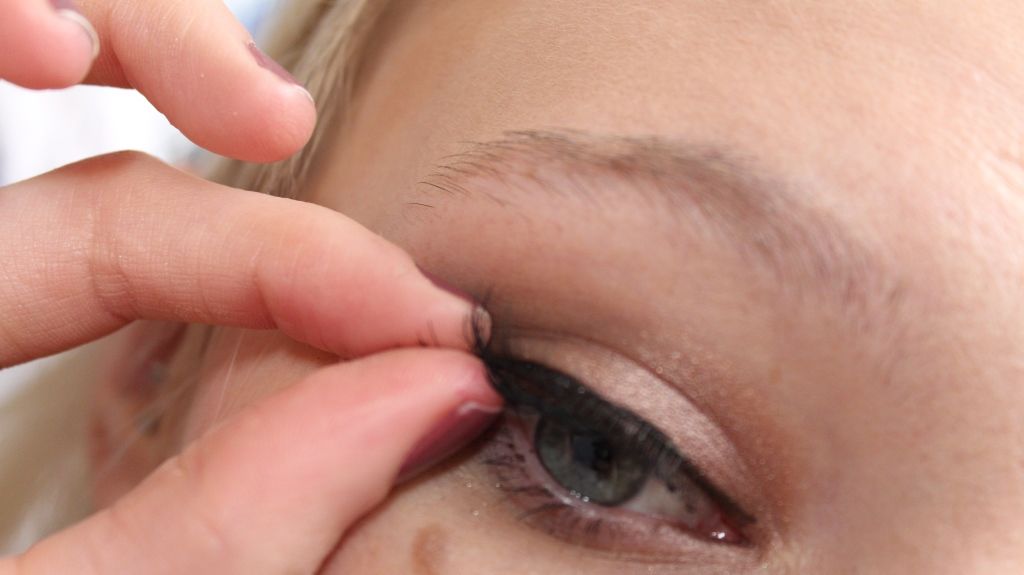
I was really pleased to see these lashes from Manicare in the box this month. I love falsies, and these are a really pretty pair that I cannot wait to use. (RRP $11.95)


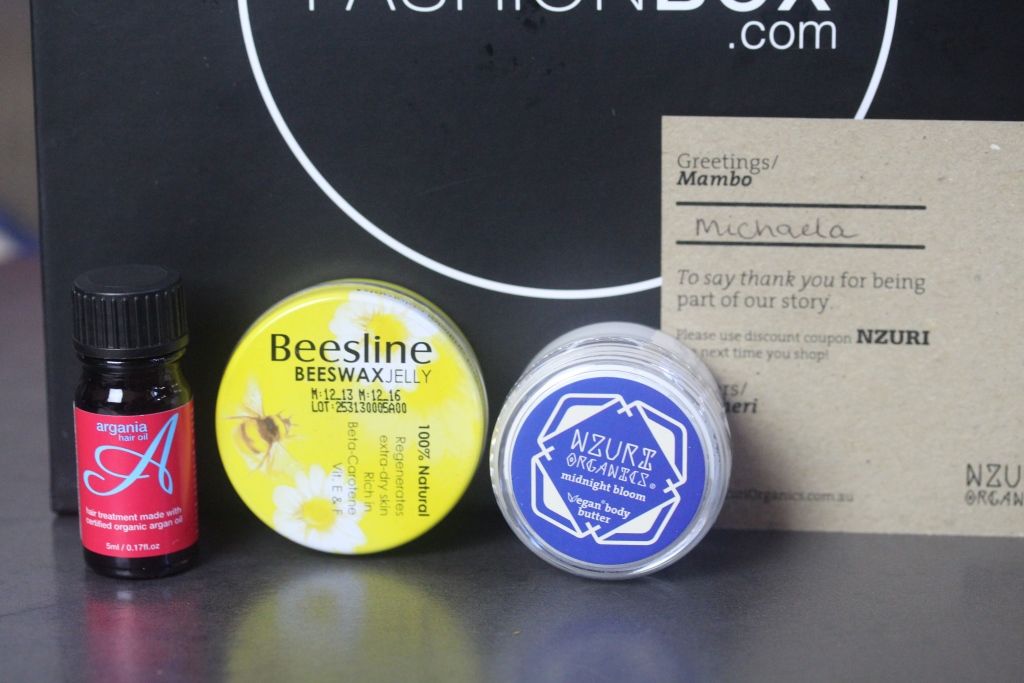
On to the beauty items! I received some Beesline Beeswax jelly (RRP $11.95). I think this is supposed to be like vaseline but all natural. It doesn't have a scent to it, and I'm really keen to use this. It has heaps of vitamins in it which will be great for healing chapped lips. 

There was a 30mL sample of the Nzuri Organics Vegan body butter (RRP $24.95 for 100mL). This smells really good, and apparently isn't available to the public until September - I love getting to trial things early, it makes me feel so spesh! The body butter is high in vitamin E, is thick like you would expect and wonderfully hydrating. Bonus points for the personalised card they added to our boxes too! 

I received another bottle of the Argania hair oil, I'm guessing for filling out the survey. I love hair oil, and I really liked this one in particular so I'm really happy with that freebie! 


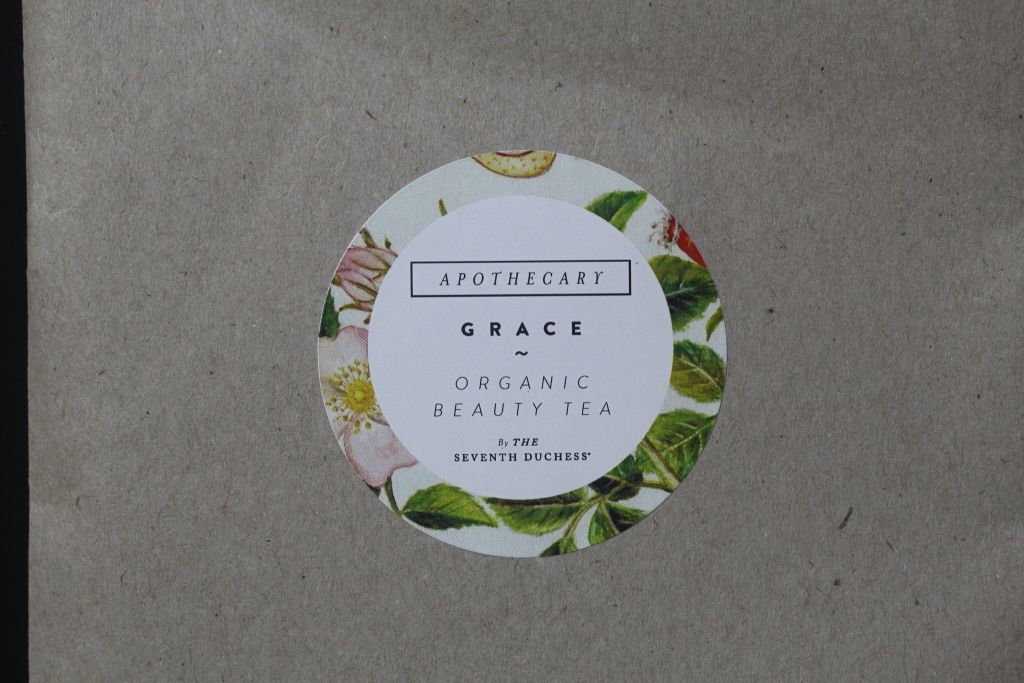
And lastly, we received a sample of the Seventh Duchess Organic Beauty Tea. This appears to be a white tea, with sarsparilla, rose petal, and rosehip which is pretty interesting. Considering I'm such a tea fiend I've never actually drunk white tea before, so it will be cool to try something different! (RRP $27 for 50g) 


post signature

Twitter | Youtube | Instagram | Pinterest | Facebook | Bloglovin
SHARE:

Tuesday, June 10, 2014

Face of the Night: Drama Eyes


I went out the other week to see some pole dancing with one of my good friends from uni. I was excited to leave the house, and took it as an excuse to have some fun with make-up. Ever since getting the Lorac Pro palette, I've really wanted to try out some of the darker shades it has to offer. I'm pretty happy with the way it turned out. 


On my eyes I used the colours (in order from L-R) Deep Purple and Slate as the main eye colours, and blended them out with Espresso and Black


Slate didn't turn out as silver on my eyes as I wanted, so I patted some of this gorgeous colour across the top. This is Bloom's Pure Mineral eye shadow in Moonstone. I love this colour, it's so dramatic and really pigmented. 


I finished up with some Maybelline Eye Studio gel eyeliner, and these gorgeous false lashes by Blync (now Model Rock Lashes)


For my face I used Revlon's Colourstay foundation, but in a lighter shade to what I normally wear. I wanted to make my face as pale as possible to really contrast with my dark eye make-up. A little bit of NYX blush in Mocha to bring a bit of colour to my face, stopping me from looking dead. I've also really been loving Maybelline's Instant Age Rewind concealer under my eyes. A lack of sleep has made those dark circles darker than normal, but this product brightens the whole area up nicely! 


And that's it! I love how this whole look turned out.
Do you wear dramatic make-up when you go out, or do you tend to keep it more natural? 

post signature

Twitter | Youtube | Instagram | Pinterest | Bloglovin
SHARE:

Wednesday, March 5, 2014

Daiso Beauty Haul


A couple of weeks ago I had to head into the city to pick up some uni textbooks. As I was walking to the bus stop, I passed a Daiso. I still had some time to spare, so thought I'd head on in. J and I checked out the one in Parramatta back in December, but I thought I'd give it another go. If you're not familiar, Daiso is basically a 100 yen Japanese store, where absolutely everything is $2.80. I picked up a bunch of things to help me organise some things at home, (more on that later) as well as picking up a few beauty items. 

I'm not going to lie, I am a little wary of $2.80 make-up, and wasn't quite game enough to try it. So instead I picked up some lashes:


I also grabbed a bottle of the famous brush cleanser. I'm happy with the cleanser I currently use for my brushes, but for $2.80...how could you not pick it up to try it? What can I say? I am a weapon of massive consumption.


I also picked up these cute nail stickers. I think the lace design is really cute, and can't wait to play with it and show you all how it turns out! 

What are your top Daiso picks?

post signature

Twitter | Youtube | Instagram | Pinterest | Bloglovin
SHARE:

Saturday, August 3, 2013

Give-away: 3 year blogging anniversary!


It is so crazy that just over three years ago, I decided to start a blog. I had no idea what to do with my blog, or the direction it would take; in fact I'd only just started reading other people's blogs myself. I was totally naive as to the extent of the blogging community and how big a part blogs play in the online world. 

I've come a long way, and I thought I'd share a few goodies to thank you guys...my readers! 

The prize:
- kikki.K Make up case (shown above) 
- MOR: Hand and Body Wash in Honey Nectar
- Revlon Lip Butter: In 020 Brown Sugar
- Australis Nail Colour: in Rose Tattoo
-Rimmel Apocalips: Lip Lacquer in 201 Solstice
- Model Rock Lashes: in Fabulous Friday
- DUO eyelash glue 
(all products were bought by myself and are unopened and unused)


To Enter:
1. Follow this blog through GFC (link in the sidebar on the right)
2. Leave me a comment below stating either:
a) If you own a blog: what have you loved the most about blogging?
b) If you don't own a blog: what is your favourite part about reading other people's blogs?

In your comment, also tell me: what is your favourite post of mine, from the last 3 years (lots to choose from!)

It's that easy!! 

a Rafflecopter giveaway


Rules and Legalities:
1. You must be over the age of 16 to enter. If you are under this age, you must have your parent's consent to enter. 
2. This is a game of skill (hence the answering of the question)
3. If you do not comply with the rules on entering, your entry will be deemed as invalid. 
4. The competition will end on the 30th August, 2013. The winner will be decided and notified, and given 24 hours to respond. If there is no response, a new winner will be decided and will also have 24 hours to respond. 
5. The prize will be mailed out, using regular Australian Post within a week of the winner responding. If the winner would like registered post or tracking, they agree to pay the costs of this. 
6. This giveaway is open internationally. 


post signature

Twitter | Youtube | Instagram | Pinterest | Bloglovin
SHARE:

Friday, July 12, 2013

Tutorial: Green Eyes


This is one of my favourite eye make-up looks, and I always get compliments when I wear it. 


These are the main colours I've used in this tutorial; 

INGLOT: matte 372 (top green) and 504 (bottom green)
URBAN DECAY: Sin and Naked, both from the Naked palette. 


To really intensify the colour, I've used Maybelline's Colour Tattoo in Edgy Emerald as a primer. If you don't have this, you can just use a regular primer, or even one with a white base to make the colour pop. 


1. I apply the colour tattoo with an Ecotools concealer brush. I just really like the shape of this brush for slathering the colour across the eyelid. 
2. From the inner corner to about halfway across the eyelid, apply the matte green. 
3. Continue into the outer corner with the darker green. 
4. Smudge some more of the darker green into the crease, to create more definition and dimension. Make sure you blend in this colour well. You want to create somewhat of a gradient between the two colours. 
5. Blend out the edges with a fluffy brush. At this stage I've added a bit of Naked to the browbone and blended it in as well. 
6. My eyes are quite small, so rather than using an eyeliner on my waterline, I continue to blend Naked down to the outer corner of my bottom lash line. 
7. I add a bit of Sin to the inner corner, to brighten up my eyes
8. Finish off with some eyeliner on the top lashline and a coat of mascara. 


I've been using the Volume Glamour Max mascara from Bourjois...I love the thick bristles for adding heaps of volume to my lashes. 


Keep the rest of your face fairly neutral...I'll usually apply a tinted lip balm for a hint of colour. Really though, you want your eyes to be the focus of this look. 

Have you rocked green eyes before?

post signature

Twitter | Youtube | Instagram | Pinterest | Hellocotton | Bloglovin
SHARE:

Thursday, May 23, 2013

How To: Apply False Eyelashes


FAR OUT I LOVE FALSE EYELASHES.
The first time you apply false eyelashes is really, really hard. It can be fiddly, confusing and frustrating.
As with most things in life, there is more than one way to do something. If you try out my method below and find out it doesn't work for you, then check out Michelle from Lab Muffin's here, because hers is slightly different to mine. This tutorial is just going to cover strip eyelashes. If there's demand for it, I might write up another post later about individual lashes.

So, strip lashes are always going to be too long for your lash line, and you'll need to trim them first. I usually just use a pair of nail scissors for this part. Take the lashes out of their packet, and hold them up to your upper lash line. Unless you're Asian, you want them to end about half a cm in from your natural lash line, so that's your trimming point. Always trim from the end, and not the inner part, because the lashes on that side are generally shorter.

Also - applying false lashes is the LAST part of your eye makeup routine.


So all you need is the lashes, some glue and some tweezers. I personally prefer Duo glue, they have one for sensitive eyes (above) and a standard one as well. I find it dries quickly, doesn't irritate my eyes and the best part is it has a brush-on applicator, which makes it really easy.


Picking up the eyelashes with your tweezers, lightly brush on a small amount of glue onto the lash line. As you can see in the picture above, you only need the tiniest amount - in fact, less is definitely more in this case.

The most common problems people have with applying false eyelashes is applying too much glue and not allowing it to dry. Think of it this way; you can always apply more quickly if you haven't applied enough, but you'll be waiting longer (and may even need to start over) if you apply too much. So a light coat is all that's needed. Give it about 10-15 seconds to dry. Sometimes waving the lashes in the air can make it dry a bit quicker. I know this is counter-intuitive, but when it dries it will be a tacky consistency, which will help them stick to your eyelid better. If it's still too wet, it won't be able to stick and will slide around on your eyelid. FRUSTRATING.


Position the eyelashes in the centre of your eye - like I mentioned earlier, you want the end to be about 0.5 cm in from your natural lash line so it doesn't drag down your eyes. Disregard this part if you're Asian though - generally Asian eyes have a straighter lashline, so the lashes won't droop. 


So I usually stick the middle part down with tweezers and then once they're positioned, stick the inner and outer ends down with my fingers. Gently pressing them together with your natural lashes will make them blend in a bit more, and help you get as close to your lashline as possible. 

It's really that simple! Repeat for the other side (obviously) and flutter, flutter away! 

So now I ask you guys; 
What's your best "applying false lashes" trick?

post signature

Twitter | Youtube | Instagram | Pinterest | Hellocotton | Bloglovin


SHARE:
© Where is my mind?. All rights reserved.
Blogger Template by pipdig