Trending

Friday, December 13, 2013

Home Tips: DIY Homemade Cleaners


Over the past few weeks, I've been experimenting quite a bit with home-made cleaners for the home. So I thought I'd share with you my favourite (and the ones that work the best) recipes so you too can get on your way to using home-made cleaners. Not only is it a hell of a lot cheaper to make your own cleaners, it's better for the environment and it's better for your health. I cleaned my entire bathroom (scrubbed grout and mould...gross, but that comes with the territory of living in a rented house) without the use of any bleach or chemicals. And now our bathroom is sparkly and white. YAY! Even better was not having to run from the room every 20 minutes because of the fumes. 

So, the ingredients you will need are:

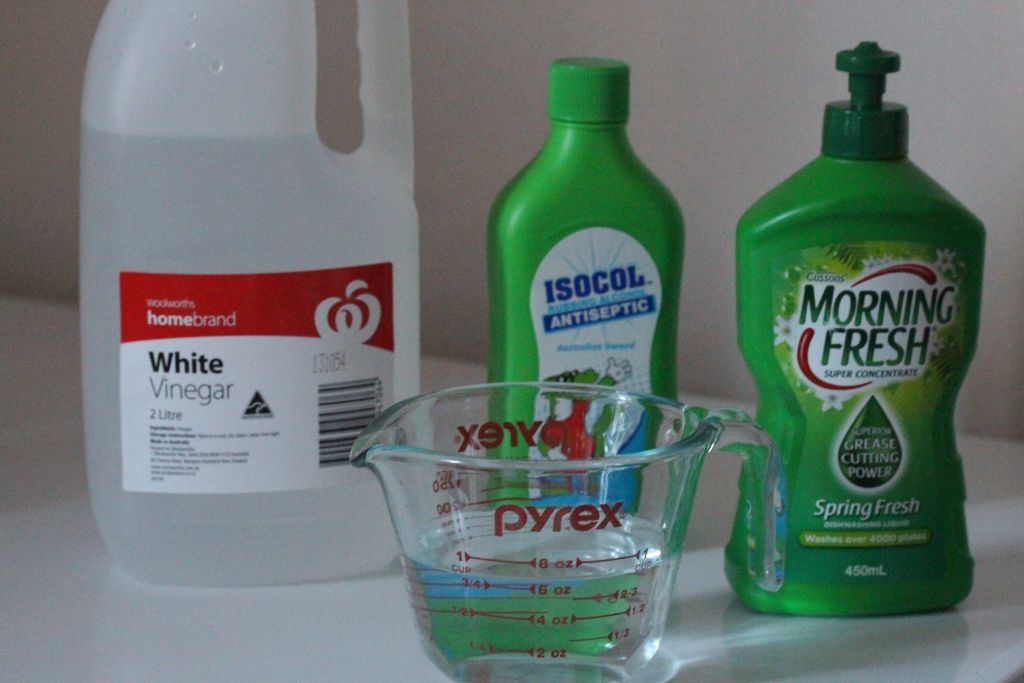
White vinegar (also known as cleaning vinegar), rubbing alcohol, dishwashing liquid and water. 
I have also started to rely on bi-carb soda quite a lot in my cleaning adventures, so you may want to have some of that on hand, even though it's not required for these recipes (I will do another post that details my bi-carb use)


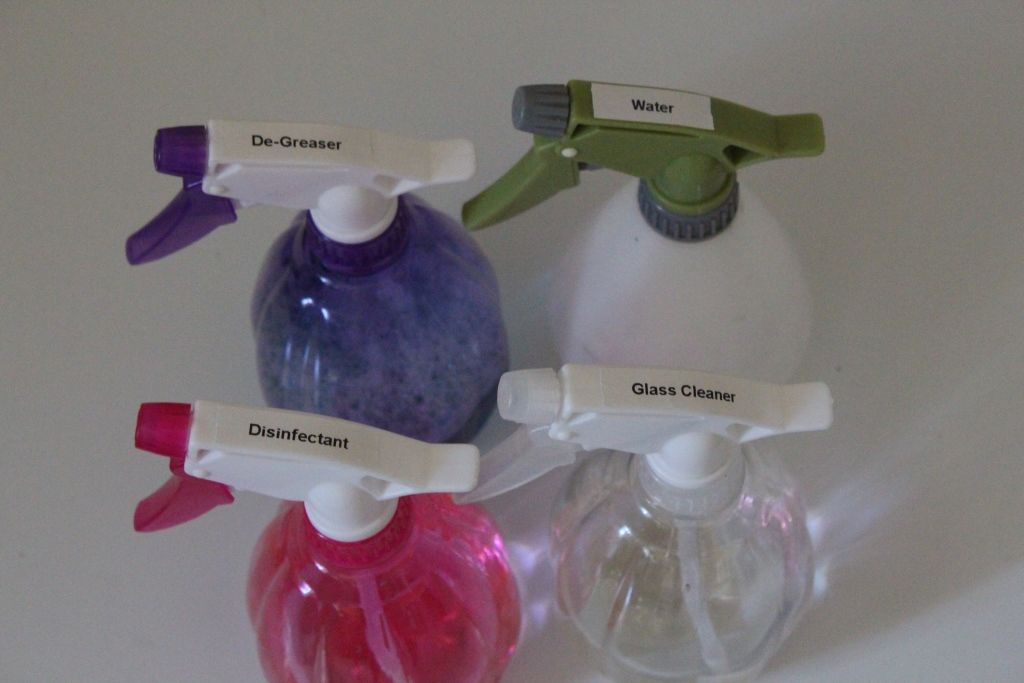
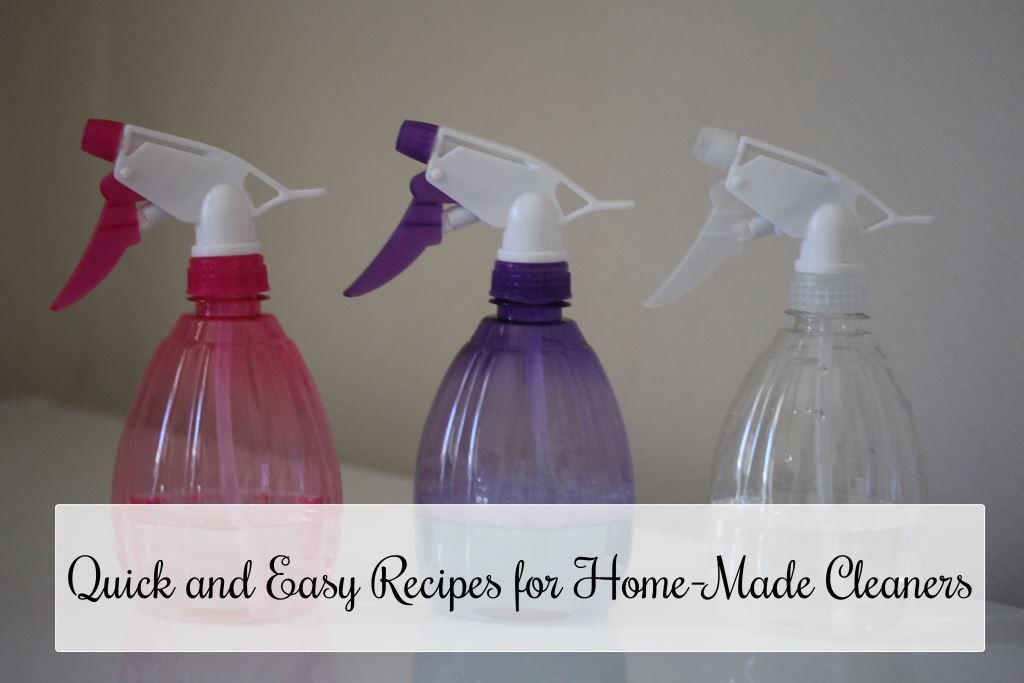
You will also want to pick up some spray bottles. I got mine from the local Woolies', and decided to go with different colours to easily differentiate between them. It's also probably not a bad idea to label them either. 

To make glass cleaner, you will need:

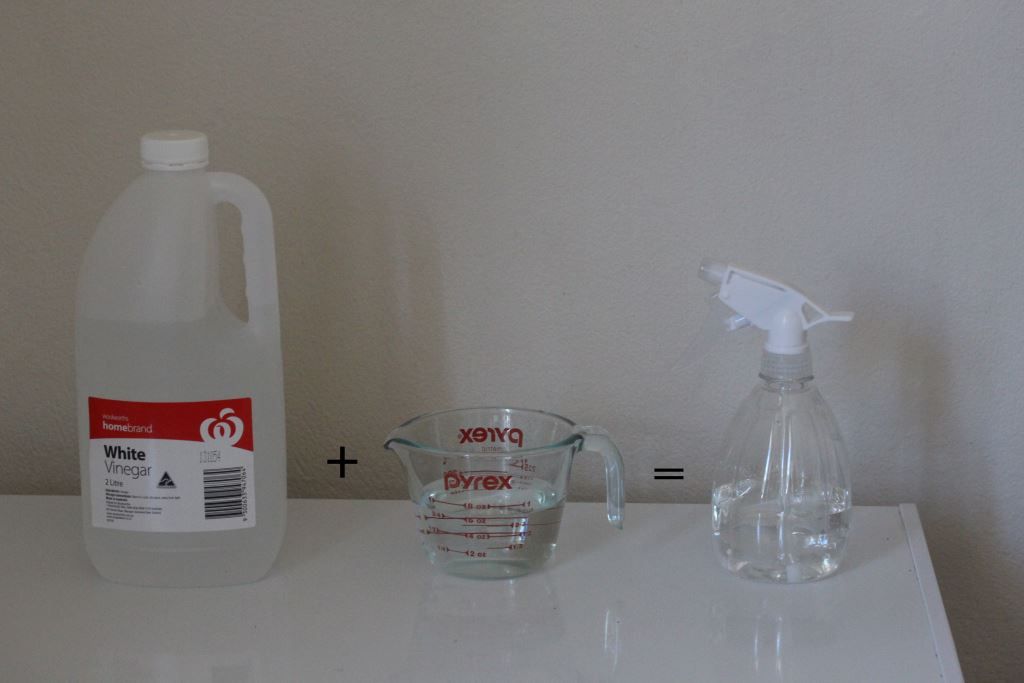
equal parts white vinegar to water. I used a cup of each. 
This glass cleaner also works really well for mirrored surfaces. It helps get rid of any smudge marks and evaporates quickly, leaving no streaking. 

To make a de-greaser and scum fighter you will need:

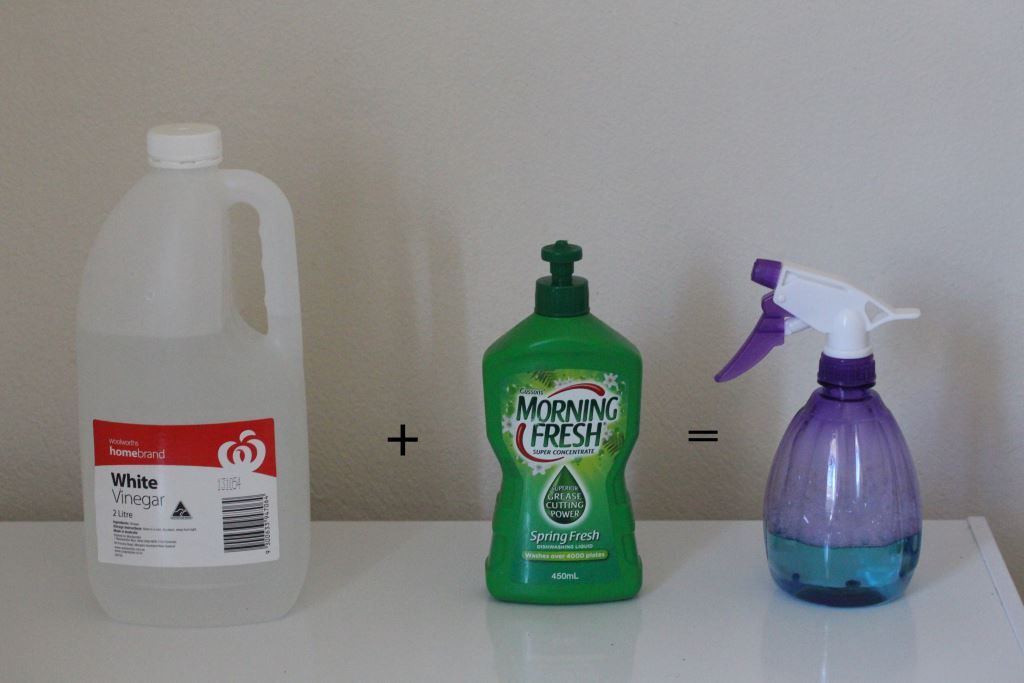
This is a tricky one to give a recipe for because the quantities can change depending on what dishwashing liquid you use. This particular dishwashing liquid is quite a high concentrate so I used about 6 tablespoons, to one cup of white vinegar. If your dishwashing liquid is not concentrated, I would use equal parts dishwashing liquid to white vinegar. 

This is a really, really powerful cleaner, and is a great one to keep in the kitchen. It's especially useful for cleaning stovetops and ovens, as well as bench-tops. When I cleaned my bathroom I used this on the tiles and glass to get rid of any built up soap scum. I also keep a spray bottle of water nearby to easily clean off any soapy residue. 

To make a household disinfectant you will need:

Equal parts rubbing alcohol to water. Again, I used a cup of each. This is really good for cleaning down computers and phones, spritzing yoga mats, wiping down cutting boards and bench tops...basically anywhere that might need a bit of a germ kill. I personally feel that soap and water (see the de-greaser recipe up above) is more than adequate for cleaning, but sometimes it doesn't hurt to disinfectant. The alcohol ensures that the product evaporates quickly and easily, meaning it won't cause damage. Just be careful around open flames.

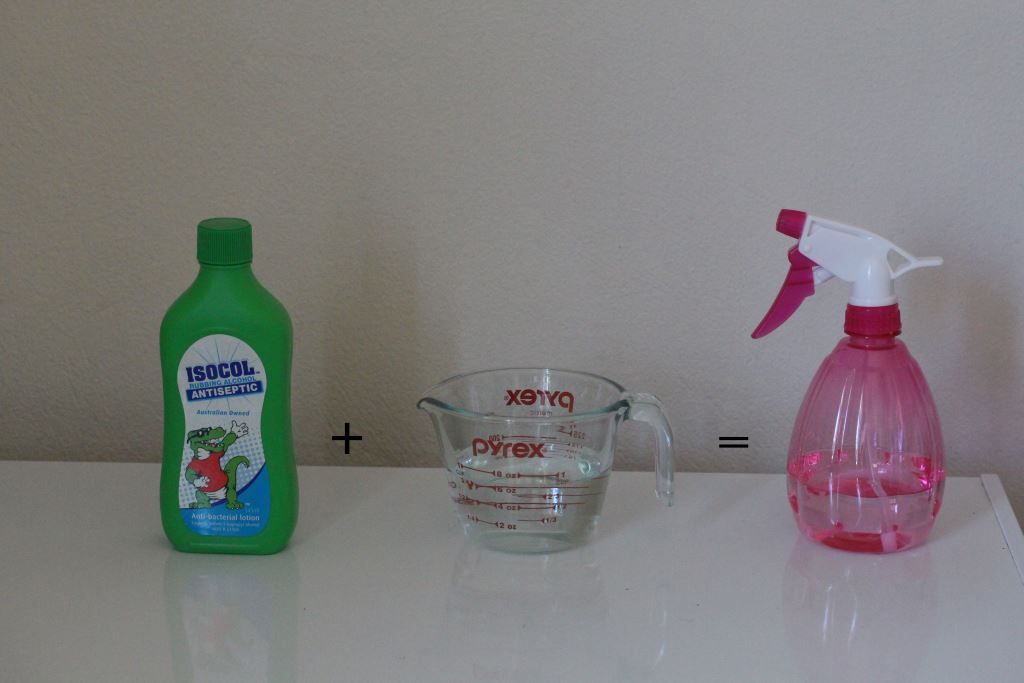
And that's it! Of course, I'm not advocating completely getting rid of all store-bought cleaners. (I still regularly use JIF on our steel counter, for instance) I think everything has a time and place, but if you can swap to using these home-made cleaners more often it will be better for everyone.
At first, the smell of the white vinegar seemed a bit strong, but with continued use of these products I barely notice it any more. The 'vinegar scent' also dissipates really quickly and doesn't build up (like chemicals can) so it will be over before you know it. I have actually noticed since switching to these that when I give our bench-tops a quick clean with some spray-and-wipe, the smell of that product is way too strong for me now. Interesting, huh?

Have you ever dabbled in home-made cleaners? Do you have any recipes to share with me? Next week I'll share my favourite uses for bi-carb soda!
post signature

Twitter | Youtube | Instagram | Pinterest | Bloglovin
SHARE:

Thursday, November 28, 2013

Origrami Instagram Prints!


A couple of weeks ago I did a Google search for where I could get instagram prints, relatively cheap. Taking shipping costs into account, the most economical website for me to get them from was Origrami. What sealed the deal for me was that they're also a Sydney-based company. I love taking the opportunity to support local peeps so this worked well for me. I was also super impressed that they had so many different options for printing your instagram photos. In the end though, I decided to go with the standard 4" x 4" "squareprint".


The hardest part about the whole process was choosing only 36 photos to be printed. After painstakingly deciding, I proceeded to payment and in less than ten days my prints arrived. YAY!


Of course, I had some ideas about what I was going to do with the prints. However once they arrived, I had the idea of turning the area next to my desk into a feature wall. I 'gridded' out the area with masking tape to make sure each photo was individually spaced and then stuck them down with blu-tac.


I seriously could not be happier with how they turned out. The quality of the photos is awesome. They're printed on a matte card, so they don't get fingerprints and are quite sturdy.

Instagram is probably my favourite app on my phone, and I love that I can now easily transcend it to "real life" and have my photos as a feature in my home. The wall that I've stuck the photos on is directly opposite to our front door, so it's the first thing I see when I come home. And honestly, that just makes me so happy. There's not a lot you can do to personalise your home when you're renting, and this is a quick, cheap and non-damaging way to do that.


I will absolutely be ordering some more prints, and my next order may be a different size! I just love these so, so much.


post signature

Twitter | Youtube | Instagram | Pinterest |Bloglovin
SHARE:

Tuesday, January 22, 2013

Organisation Tips: Bathroom Drawers!

Our bathroom has absolutely zero storage in it. So when we moved in, we put in some old desk drawers to go under the sink. Not ideal, but it works for the moment. Or at least until we move.

I didn't really have an organisational system in place, and over time, the top drawer ended up being a dumping ground for everything and anything. Last weekend I decided I was completely over it and cleaned and re-organised.

Our bathroom is really cramped, so the first thing I did was take all the drawers out into my living room so I had some more space to work with. After I snapped the below photo I literally took all the products out. I laid everything on the floor and loosely grouped everything into categories. I'm very much a visual person so with this method I could work out the best way to store everything.


So this is what I was working with. From left to right, is top drawer, middle drawer and bottom drawer.
I decided that these drawers were going to be a place for excess product storage.
Here are the before and afters:

TOP DRAWER:


Before

The top drawer was the most convenient for me to throw things in that I use often, so I kept this in mind when deciding what to place in this drawer. I'm at my laziest at night time, when I just want to brush my teeth and jump into bed. I also have a lot of excess 'skincare' product, and so decided to dedicate this drawer accordingly. 

After

I didn't use drawer dividers for this one as all the products in here are bulky or in their own packaging anyway. I kept my toothbrush on top, closest to the front and the cotton buds in easy reach. Products I reach for less frequently were stored closer to the back. The great thing about these drawers though is that they aren't too deep so I'm not going to forget that I have things and never use them. 

MIDDLE DRAWER:

Before

This drawer is a little further out of the way than the top one, so it literally became a dumping ground for things I couldn't be bothered dealing with. Empty packets were thrown in here for later blog posts (I've never even done an empties post in my life), as well as other random bits and bobs. (You never know when you'll need some spare toothbrushes or extra gloves!) Knowing how I currently use this drawer, I decided to base it loosely around the same principle. 

After

This drawer became the place to store extra make-up and other misc items. Extra waxing strips and razors went in here, as did bottles for bath soak (I don't even have a bath....sigh) I used the packaging from an old Bellabox to keep smaller make-up items in and placed these towards the back. These are items that I don't use often enough to warrant having them in with all my other make up. Poor neglected eye shadows...

BOTTOM DRAWER:

Before

This drawer stored exactly what it looks like - extra make up bags and bits and bobs. This drawer is the most inconvenient for me to use, y'know having to bend down and all. So I've now kept all travel related beauty items in here. 
After

This drawer now not only houses all my travel bags, but also any travel sized containers. This way, when I do need to pack to head off somewhere everything is in this one place. Too easy! 

So far this system is working really well for me. Everything now has a home and I know exactly where to find things. Once things are in this state I'm quite good at putting things back where they belong so this will be an easy system for me to maintain; especially when I'm bleary eyed and ready for bed. 
The most important thing to keep in mind when re-organising a space in your house is how you use the space currently, and what you can do to make it not only more efficient, but easy to use without thinking about it. 

How do you organise your bathroom drawers? Anyone else cursed with absolutely zero space? What are YOUR tips?

post signature

Twitter | Youtube | Instagram | Pinterest | Hellocotton | Bloglovin
SHARE:

Sunday, September 16, 2012

My Week in Pictures #8

IMG_20120914_172436

This Friday was J's birthday! Thinking it would be a fun idea and a nice surprise, I headed out to Woolworths to buy a pack of 40 balloons. I was planning on putting them all over the apartment for when he got home. Firstly, I seriously underestimated what 40 balloons looks like, and to get the effect I had dreamed up I probably would have needed about 100. Now, if you don't know - I'm asthmatic. And as someone with dodgy lungs, blowing up 40 balloons was probably a bit over-ambitious. So when I realised at first how difficult it was, I sought out another means of blowing them up and came across my bike pump. Note: this does not work and caused the balloons to blow up in my face.
Anyway, it took me about an hour but I blew them all up and tied them by hand (the labours of love!)

IMG_20120914_183945 IMG_20120914_201524
So last night we went to see "Super Villain" - a comedy show by Seizure Kaiser, and it was on at the Factory Theatre.
The show was seriously hilarious, and if you're in Sydney and you love comedy, he'll be back for the Sydney Comedy Festival so I highly recommend checking him out.

IMG_20120914_204600 IMG_20120914_205632 IMG_20120914_213035

We finished off the night with cake and takeaway Thai. 


IMG_20120908_202002 IMG_20120915_151959 IMG_20120915_190510 IMG_20120916_093523

And some other snaps from the week - 
1) Rommy discovered the fish tank, and enjoys spending his time sitting on the chair watching them. 
2) Choice of essay questions for my politics and the media class. It really pains me when university lecturers have poor grammar. Proofread, anyone?
3 and 4) J bought some new fish for his birthday. There's a couple more than these two, but on the left we have a butterfly fish and on the right are two tomato clownfish. They're a breeding pair so soon we'll have baby clownfish!

What did you get up to this week?

post signature

Twitter | Youtube | Instagram | Pinterest | Hellocotton | Bloglovin
SHARE:

Friday, April 6, 2012

Organisation Tips! - Drawers


Does anyone else's drawers looks like this?
It was driving me absolutely CRAZY having to constantly re-fold EVERYTHING every time I put washing away, so today I thought "enough is enough" and set out to re-organise it.

Drawing inspiration from the way I file away notes and other important docs, I cleaned everything out and started again.
This is the finished product:


Not only is it a million times easier and a million times nicer looking, it fits double the amount of clothes that piling them on top of each other does.

This is how I folded it all, so you can do the same to your drawers!

(from left to right)

1. Lay your shirt / cardi / whatever out on a nice flat surface. 
I used my bed. 
2. Fold the arms in to the centre. 
3. Fold the left side into the centre


4. Fold the right side into the centre
5. Fold the bottom side up
6. Fold the top half under 
(if bulky. If not bulky, e.g. a t-shirt you can also fold on top)

EASY PEASY LEMON-SQUEEZY. 

I can't believe I hadn't thought of it earlier!!
It also works for shorts and jumpsuits and things:

However, because there's so much more fabric to pants they're a little more difficult. 
So I just piled them like I used to. 
I still save so much more room this way, and shorts are super easy to access without messing up my pants!

SHARE:

Sunday, October 9, 2011

Past Happenings!

So..I apologise for my lengthy absence. 
I don't even have a decent excuse, such as being busy with uni. 
I've just spent the last week and a bit relaxing and giving my head a well-deserved break from studying.

Here are some snapshots of what I've been up to. 
They're less than satisfactory considering how long I've been absent, but I also haven't been up to very much. Lots of reading, and lots of playstation-ing. 

I cooked a delicious fig, chicken and prosciutto salad:

Ingredients all laid out.

Mixture for the figs. 
Figs aren't in season, so I used dried ones and let them simmer in this mixture for longer than the recipe said. It was well worth the wait, it came out amazingly:


I paid Izzie another visit! She's getting so big and cutey!!
She's very friendly and loves a good pat!

I strayed from my usual red nailpolish and got this bright blue from Sportsgirl. 
I really am enjoying it, and it's nice for a change.

And I bought a new desk!!
This is great - extra shelves, and really wide so I can use my lappy and my textbooks. 

Trust though, I have already cluttered it all up. 
SHARE:

Tuesday, September 13, 2011

Interior Dreaming


SHARE:
© Where is my mind?. All rights reserved.
Blogger Template by pipdig